Kit in progress... Spitfire Mk1 - from June 1940
- 30 October 2011 23:18134242I said I would post my next build and explain the process.
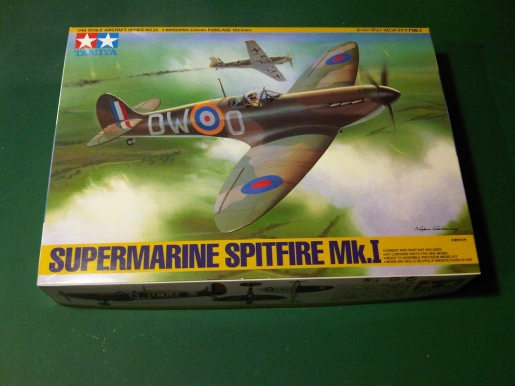
Here is the kit box:

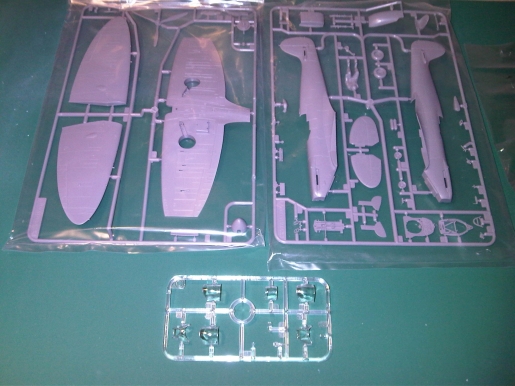
Inside are three sprue - one of them transparencies:

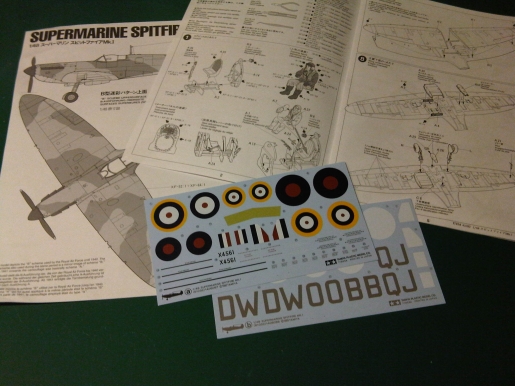
The decals and instructions - these should be used as a guide rather than a strict order of build. You have to look at them and plan your build ahead including what version you are doing.

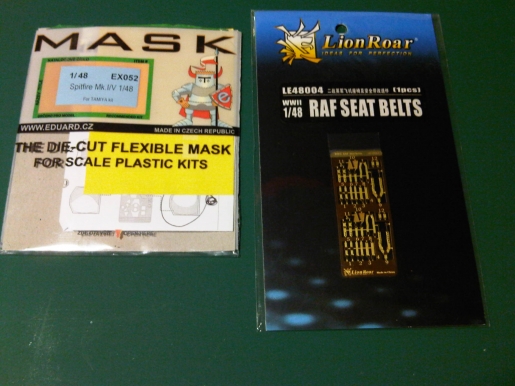
I am building out of the box except for two things: Canopy paint masks and aftermarket seat belts made from photo etch brass:

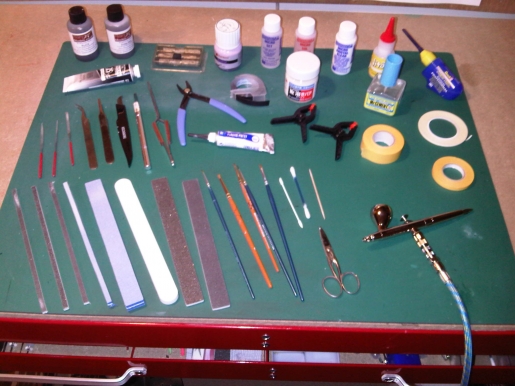
Here is a shot of the tools needed for the build. It includes four types of adhesives, sanding sticks and sponges of various grades, knives, scribing tools etc.

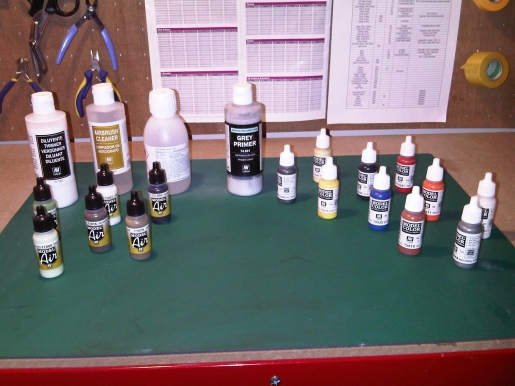
I am using Vallejo paints and varnishes. The ones in the black tops are for the airbrush, mainly camo colours, and the while tops for the hairy sticks.

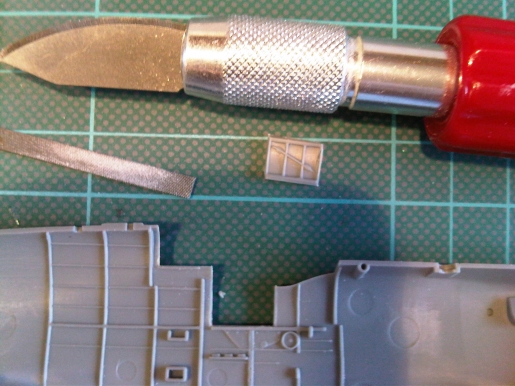
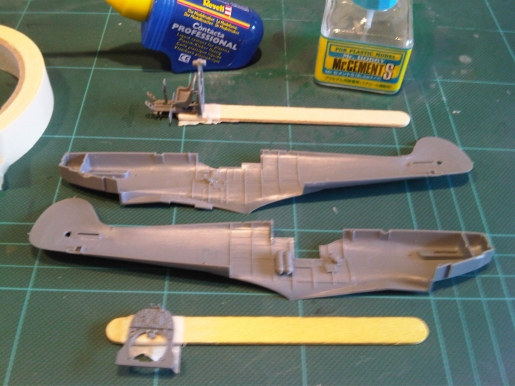
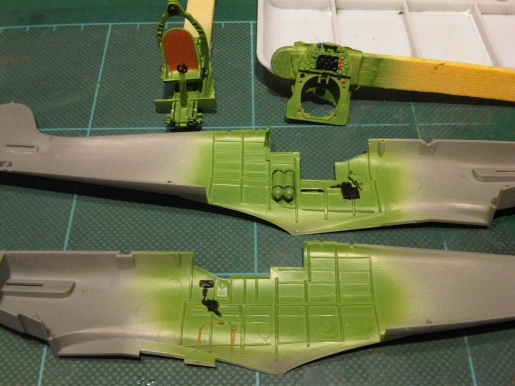
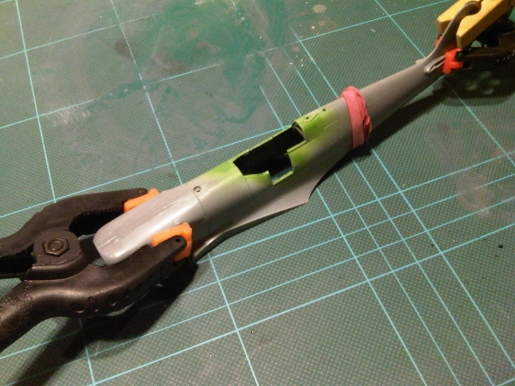
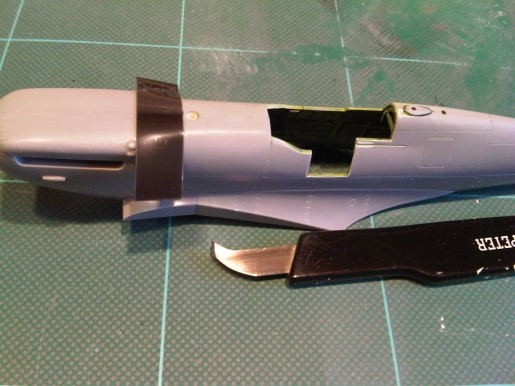
First stage is to detach and clean up the interior parts. All moulding blemishes need to be removed. This shot is all the parts for the interior after cleaning them up I build whatever sub assemblies are needed for painting. Note the fuselage half - I have to cut out the pilot's door so I can pose it open to display the inside.

Here is the part after carefully removing the door - it needs a bit of a clean up.

Those interior parts make these sub-assemblies ready for painting. Each is placed on a lolly stick ready to do facilitate this.

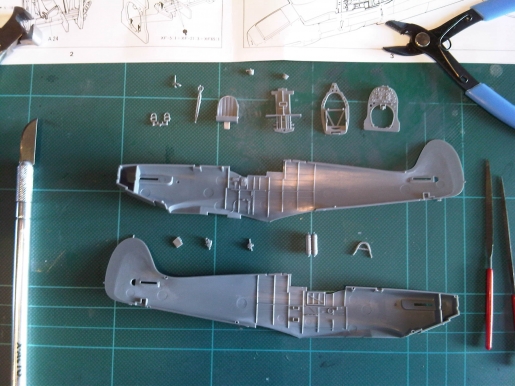
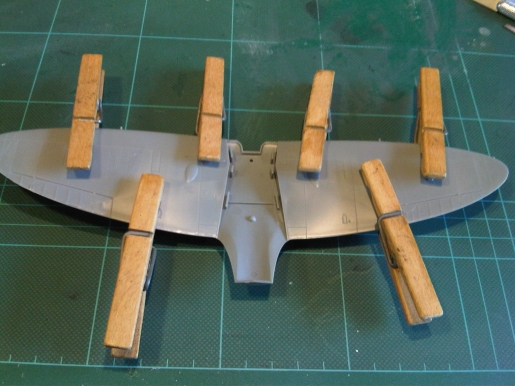
Because it is a simple model I am moving on to clean up all the parts ready for painting and building other sub-assemblies. This is the wing, glues together and drying.

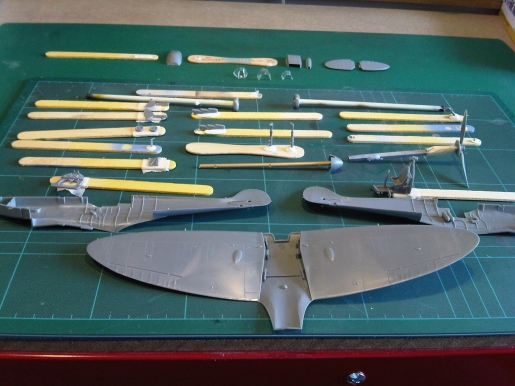
A shot of all the various pieces, cleaned up and mostly ready for a primer coat:

The next stage though will be to mask the canopies and to sand out the joint lines in the wing so they appear as a whole and not as pieces stuck together. Once that is done I will airbrush a primer coat on the interior and the detailed pieces that I will paint before they are attached.
I spent 2 1/2 hours today getting to that stage and I will post the next stage when it is done. - 31 October 2011 01:02134252That's great, Barry.

Spitfires came from the factory "somewhere in England" with a pair of heavy Vickers machineguns, which was what gave them their biting edge.
You have deepened my desire to build some model wind-turbines. These should be proto-types of the real thing! All top secret for now, as I'll have to think of patenting them once they are proven functional.Chanters, Drums and Drones Potty Time http://youtu.be/99fMqpjnXYA
Rule Britannia!
Kent First http://youtu.be/04F3mAP3fV4 Keep banging on http://youtu.be/qYCU_SKmkGQ - 31 October 2011 07:39134256Spitfire Mk1s were armed with 8 x .303 Browning machine guns, four per wing. They later introduced the 'B' wing on the MkV with two Brownings per wing plus a Hispano cannon firing explosive rounds - see my MkVb build pics to see that. 'C' 'D' and 'E' wings were later introduced with different gun combinations.
Glad you enjoy the thread Alex. - 31 October 2011 08:19134266Its worth expanding on my earlier reply to Alex and he is not 100% wrong about the guns. The original plan was to have two Vickers, that is correct, but during development, as early as 1935, it was decided that this was far too light and the specification was redrawn to 8 Brownings. No Spits entered service with the Vickers guns.
I mentioned the 'B' wings as well. A squadron of Mk1's were equipped with Hispano's in June 1940 but the cannon were so unreliable the squadron was re-equipped with the 8 Brownings fairly quickly after and certainly in time for the Battle of Britain. The problems with the Hispanos was eventually ironed out and they were successfully introduced in the mkV Spit.
The reason for the Hispanos was because the 8 Brownings were not powerful enough against larger aircraft and an awful lot of rounds had to be expended to bring them down. - 1 November 2011 01:30134419You're right, Barry, I had in mind the original plans when mentioning the Vickers, and had fotgotten about the Brownings.
The explosive rounds, which were technically cannon shells, were indeed a novelty in the Second WW, and the Luftwaffe also made use of them in 1940.
In the same 1940, the Luftwaffe completely destroyed the two main Spitfire factories in Southampton; but by that time most production was already carried out in unspecified locations.Chanters, Drums and Drones Potty Time http://youtu.be/99fMqpjnXYA
Rule Britannia!
Kent First http://youtu.be/04F3mAP3fV4 Keep banging on http://youtu.be/qYCU_SKmkGQ - 1 November 2011 07:39134421Castle Bromwich, Alexander.
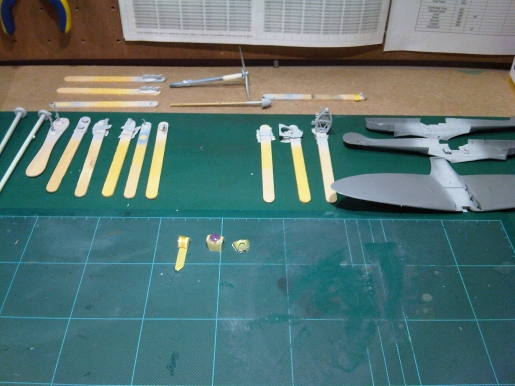
- 1 November 2011 07:49134422Well, I did an hour and half last night. Not a lot to show for that, cleaned up the wings and blended the seam, masked the canopies and airbrushed a primer where needed for now.

The parts on the left will be airbrushed a base colour of Sky (Duck Egg Blue) the aircraft underside while those of the right Cockpit Green. The canopies are shown and will now be put to one side and the bits at the back will be airbrushed various colours as appropriate, yellow tips to the props then masked and then a toned down black. Detail painting follows with a 'hairy stick' before weathering the inside to bring out detail. Some parts will go to one side for further treatment at a later stage.
The next photo will show the parts ready for weathering. - 1 November 2011 07:51134423Ahh... managed to get the pic open above. so deleted this post, I had a problem.
- 1 November 2011 12:14134439One of the canopy pieces was broken in the box, spotted it when I was masking up. Just found that a replacement will cost £8.50 and will take 5 weeks to get to me. This is, however, to be the second to last piece to add to the kit so it will not interrupt the rest of the build process, which is likely to take 3/4 weeks anyway. A pain in the neck...
As I mentioned on another thread, Airfix do a lot lot, better than this, brilliant as Tamiya kits are. - 1 November 2011 12:17134441Barry there are bound to be model builders' forums out there where you can shame the manufacturers into compliance!I'm an optimist. But I'm an optimist who takes my raincoat - Harold Wilson
- 1 November 2011 13:54134457There are and it is done.... I am a member of three of them.
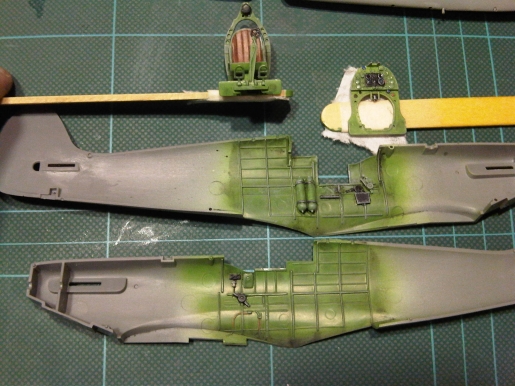
- 2 November 2011 14:26134600Here is the interior painted - all fresh, too fresh and detail not showing much. That can be corrected and that will be the next stage. I will emphasise 'lowlights' with a black oil wash getting into nooks and crannies and creating shadows and will then do some 'dry-brushing' of highlights. The next photo will be of the results so you can see a comparison, pity the bulk of this detail will be hidden...

Also got the propeller and some other pieces to airbrush, hopefully all tonight. - 3 November 2011 10:28134659Here is the new 'worn and used' look with the details brought out.

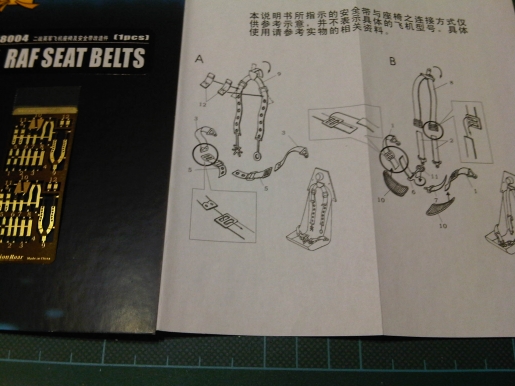
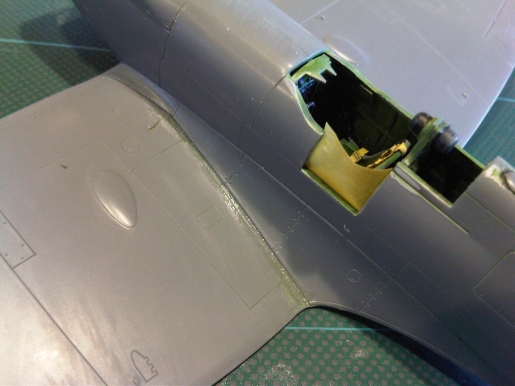
Next stage is to build up some more sub assemblies first being the trick photo etched seatbelt (pictured) which will also need painting before fixing to model.

Hopefully I will have that done tonight if time. - 4 November 2011 13:01134914Got a bit more done last night...
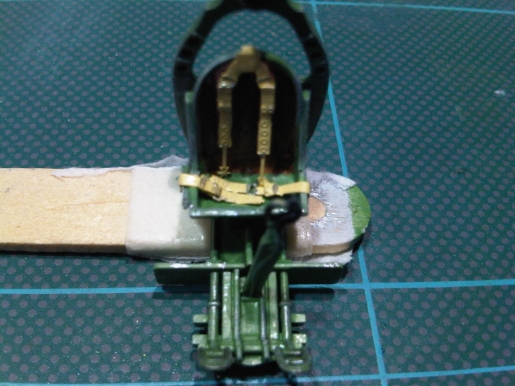
The seat is finished and here is how it looks now: The 'blown up image' does not make it look at its best!!! shows up all the flaws.

Also joined the fuselage together. Next is to sand down the joints and blend them in.

- 6 November 2011 12:24135203Not had a massive amount of time this weekend for it but I have made a fair bit of progress. I painted the seams with black, very thinned down, so it is drawn into the joints by capillary action. This helps me with sanding down the seams and blending them together.

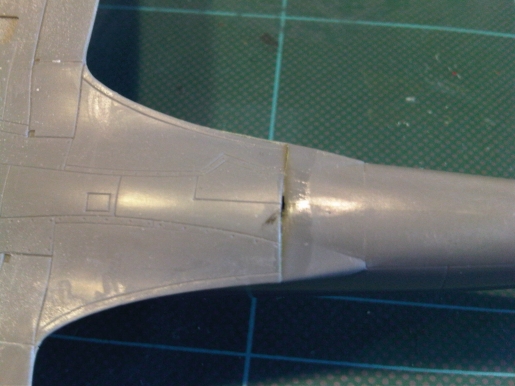
The fit of Tamiya kits is such that no filler was needed and once I was happy with the seams and polished the sanded areas I had to re-scribe the panel lines lost in sanding. These lines are important to the final look of the kit and this is one of the trickier jobs as a slip of the scriber would cause a lot of difficulties to correct.

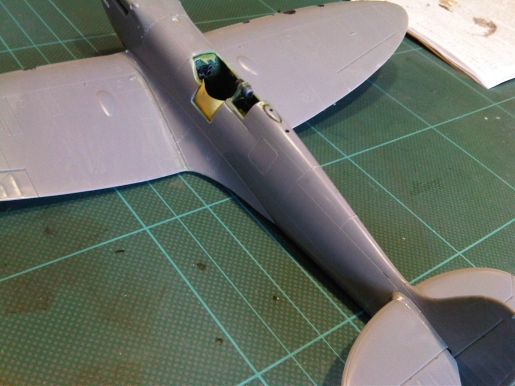
Then I fitted the cockpit interior and the wings to the fuselage. Those of you whose only experience was the little old Airfix kits would be astonished at the way the kit fits. Perfect joins, the join itself is a panel line and needs no treatment at all.

I did have a small gap where the wing piece fits the fuselage and a little 'dissolved putty' corrects that. Needs a bit of a clean up but that's all.


With a few additions the classic Spitfire airframe is starting to take shape.

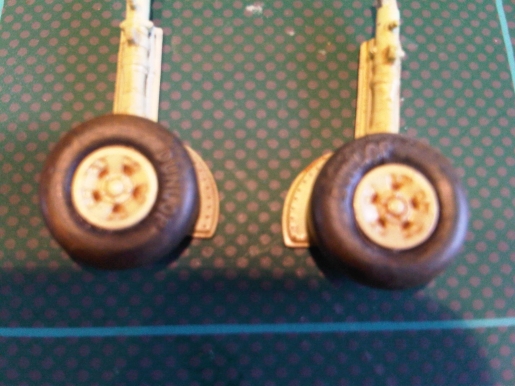
Here are the main undercarriage legs, looking suitably dirty and used, not the best of pics but the level of detail in these kits is such that you may be able to read the 'Dunlop' brand on the tyre.

Well next is some clean up of joints around the wing roots and an alcohol wash for the kit ready for a primer coat. Once primed I will be able to identify any flaws needing to be sorted.
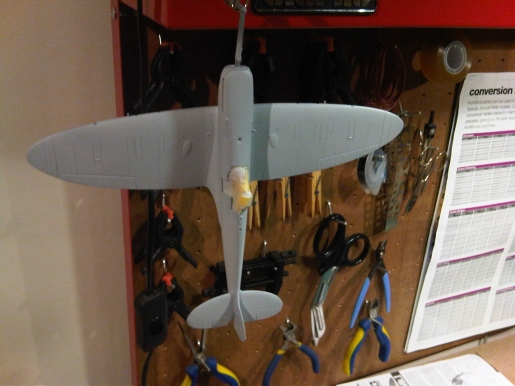
Ah - someone, not a member, who views the forum asked me to post some pics of my 'set-up' for doing this. I will do so when the build is finished. - 8 November 2011 08:34135463A bit more progress made. The first pic is of the Spit masked up and ready for a primer coat.

I then fixed a piece of plastic sprue into the spinner with superglue, it will break off cleanly when needed but it does provide something to hold and hang the model by while it dries. I then primed it and when it dried checked for flaws in the model, there were very few and it did not take long the clean them up. I then re-sprayed with primer where I had sanded it off.
Here it is hanging up drying. It needs to cure properly before the next stage.

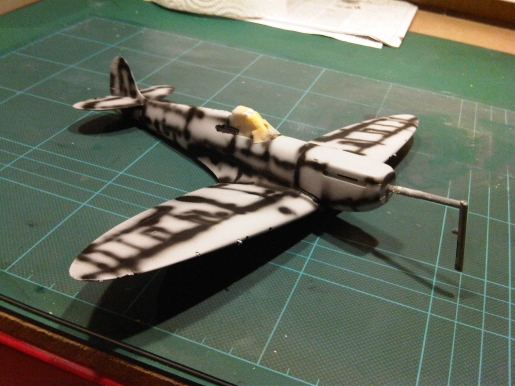
The next stage is a tricky one for me. Something I have not tried before but I need to do so because it will be more important for the larger scale kits I plan to start soon and these smaller ones are just 'work-ups' to that.
This is called pre-shading in which I blow black paint from the airbrush along and around all panel lines. This is meant to show through the top camo coat and replicate the accumulated dirt and grime. When I have bleached the middle of the panels and done a dirt wash it can look very effective. I am a novice with an airbrush and am not sure how it will work out, we shall see, the good thing is that it is not meant to look like neat and tidy grid lines but is meant to be a bit rough and haphazard. The model will look a mess when its done....
I will post the results when done, it may take a couple of sessions. Fingers crossed. - 8 November 2011 10:41135475Amazing amount of patience and very good work there Barry - very well done.
Thanks for posting the photos too.
Roger - 8 November 2011 11:22135489Thanks Roger.
- 9 November 2011 08:23135672It looks horrible but here it is with the pre-shading. My novice attempts at airbrushing really shows, the lines are too thick and too inconsistent. That said it is not meant to look good and not meant to look too even. In addition I will be able to improve appearance when I airbrush the top coat, in some places it will get an extra coat of two in order to compensate. Not ideal but it will turn out OK. I know where I went wrong, the small 0.15mm needle I used clogged too easily making the flow inconsistent, I should have thinned the paint more or used my main 0.4mm needle. I know what to do next time and this is the whole point, to try these new things, make mistakes and adjust. My next 1:48 pre-shading will be a lot better....

- 9 November 2011 08:48135675Look forward to seeing the next stage Barry.
Roger